Overview
Your Supermove account comes pre-configured with a number of email templates. Some of these templates include the following:
- Send Confirmation email template: the email your customers receive when they are ready to book and confirm their move
- Confirmation Complete email template: the message your customers receive after they've confirmed a move, letting them know they have completed all appropriate steps and the move has been successfully scheduled
- Final Move Receipt email template: the message your customers receive upon completion of a move, which will include PDF documents of forms signed that day
While you may find many of these templates immediately helpful, you may also want to create your own custom, personalized templates. Please view the following on how you can create custom templates.
Navigating to the Email Template Screen
To navigate to the email builder section of Supermove, please do the following from your Office App:
- Click Settings
- Click View/Edit Communication Setting
- Click + Create Email Template to create a new template or click the Pencil Icon to edit an existing template
Building a New Email Template
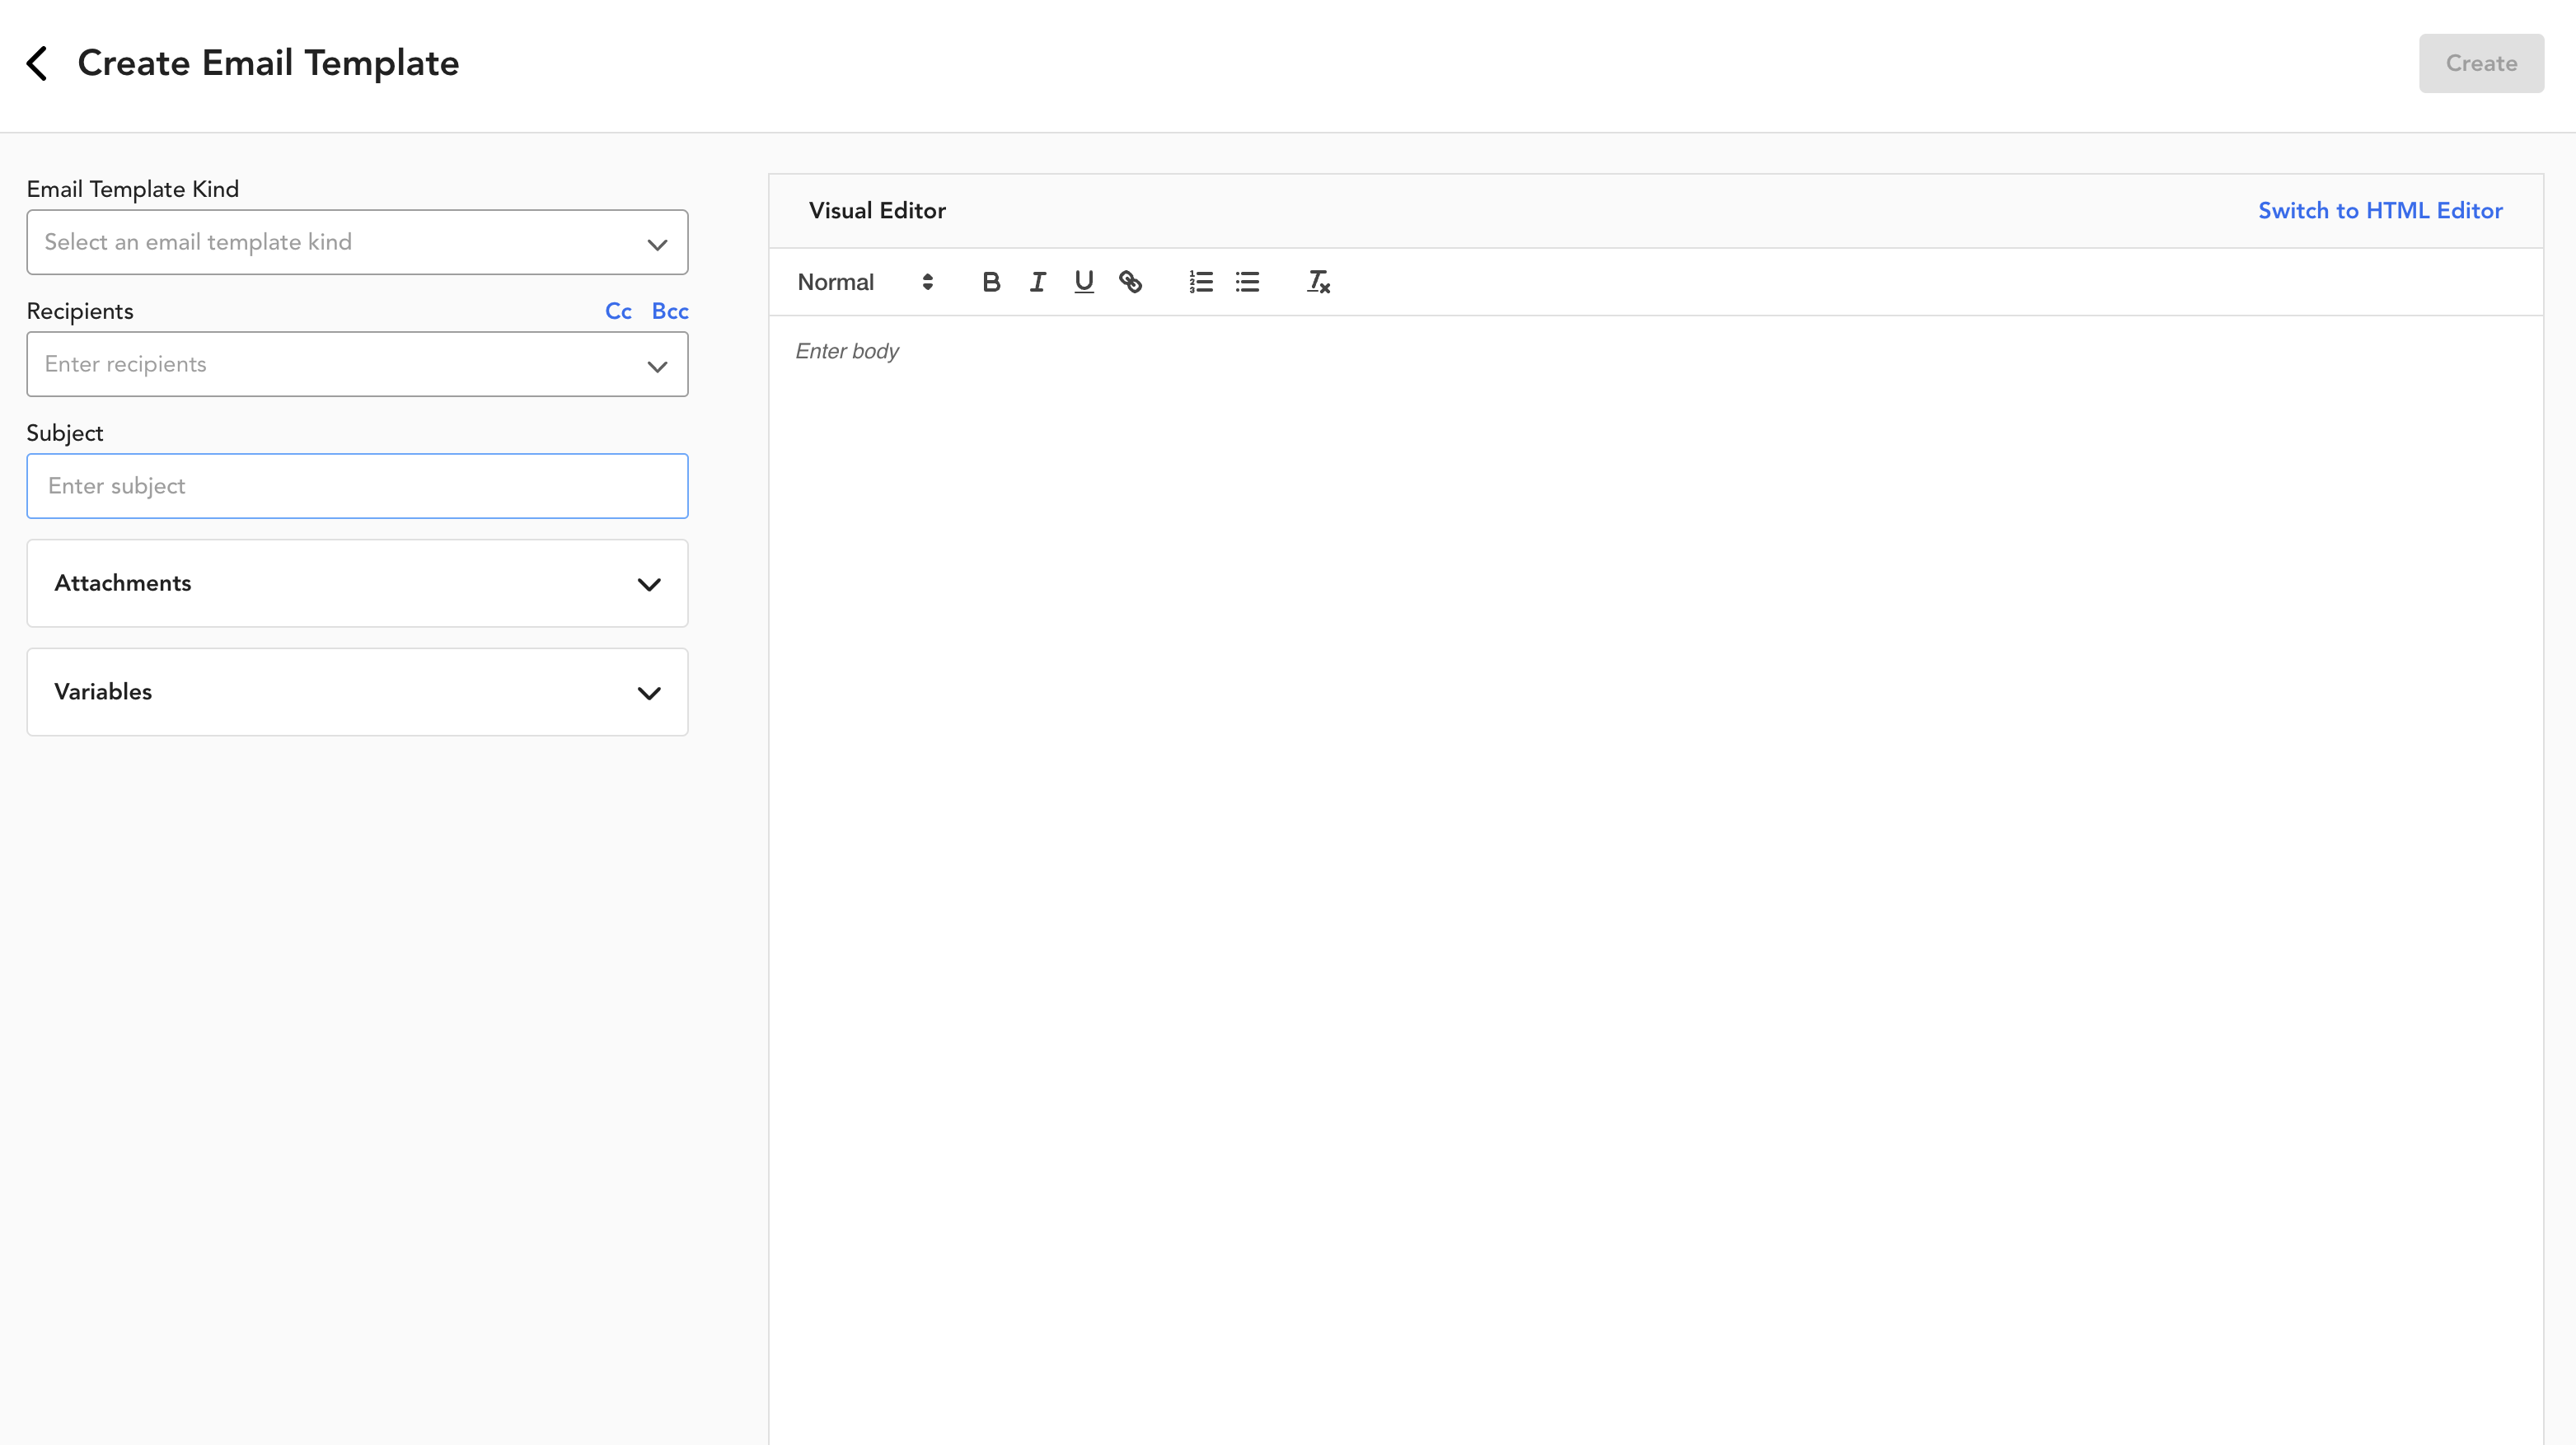
Your email template page will look something like this:
The main fields on the screen are as follows:
- Email Template Kind: this selection designates the purpose of your new email template
- Recipients: this designates who should receive the message. Please be aware you can also configure the message to accommodate CC and BCC recipients
- Subject Line and Email Composition: this is where you can create the content of your email message
- Attachments: you can add in files and forms that will automatically be a part of your new email template
- HTML Editor: You also have the ability to build emails from HTML. You may find this helpful if you have an existing email template with HTML formatting from another platform that you want to import
Once you are finished, you may have a custom email template that may look something like this:
If you are satisfied with your template, click the Create button in the top right-hand corner.
Comments
0 comments
Please sign in to leave a comment.